

TL;DR
- Useful AI photo editing prompts name the edit, its location and the product details that must stay unchanged.
- Upload a real product photo first. A description alone cannot establish the exact item you sell.
- Start with one change, such as a background replacement. Check the label, color, shape and included parts before adding another edit.
- The 15 prompts below are original starting templates, not a tested prompt benchmark. Preservation instructions can fail.
- For an actual garment replacement, use the clothes-changing workflow instead of asking a general photo edit to invent a product.
A successful ecommerce edit helps a shopper see the same product more clearly. A prettier picture that changes the bottle cap, removes a seam or invents a bundle is a failed edit.
This guide is published by UGC Maker. The workflow follows the editor's available controls; the prompt examples were prepared with AI assistance and have not been validated through controlled output tests. Treat each result as a candidate to inspect, not as approved product photography.
Choose the edit before writing the prompt
Separate product documentation from campaign styling. A packshot needs recognizable product details. A campaign visual can explore a setting, but it still needs to represent the item accurately.
| Your task | Start with | Keep fixed | Reject the result if |
|---|---|---|---|
| Clean a product image | Background-only instruction | Silhouette, label, color, parts | Edges or lettering change |
| Improve visibility | A specific lighting adjustment | Material finish and real surface details | Matte material becomes glossy |
| Make an ad composition | Canvas and placement instruction | Product scale and geometry | The product stretches to fill space |
| Show a real color variant | A photo of that actual variant | All product attributes | AI invents a shade you do not sell |
If the original label is unreadable, find a better source. Asking a model to make it legible may produce plausible lettering rather than the correct text.
A prompt structure you can reuse
Write four parts: source → change → preserve → exclude.
Use the uploaded photo as the product reference. Change only specific area or property to desired result. Preserve visible product attributes. Do not add objects, text or effects that would misrepresent the item.
Replace every bracket with a concrete instruction. “Preserve the three front buttons and the stitched pocket” is more useful to inspect than “keep everything perfect.” Those words still do not lock pixels; compare the result against the source.
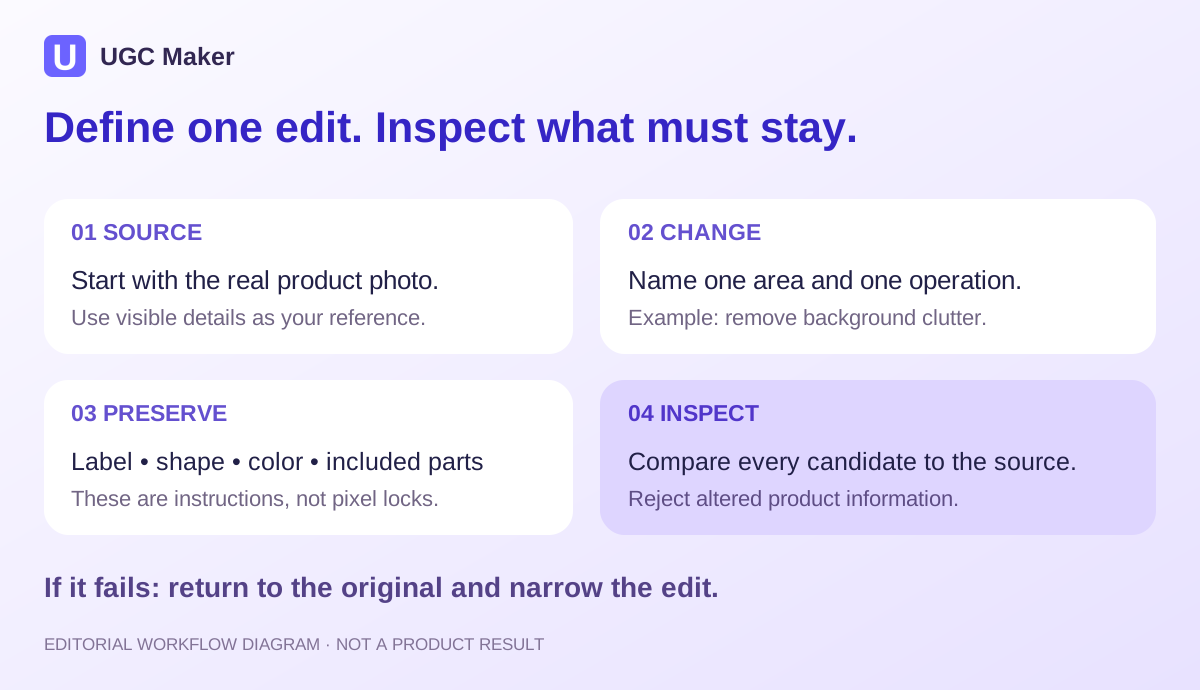
Editorial diagram: a way to scope an edit, not a screenshot or a measured output.
15 AI photo editing prompts to adapt
These templates assume you have uploaded a product photo. Use the matching prompt as a first attempt, and apply its check before accepting the result.
1. Remove a distracting background
Edit the area around the product into a plain white backdrop. Keep the product in its current position and viewing angle. Preserve its outline, printed label, cap and visible surface marks. Leave the frame free of props and new text.
Check: Look along fine edges and transparent parts. Reject missing handles, halos or altered lettering. A white background alone does not establish marketplace compliance.
2. Repair a crease in the backdrop
Smooth the crease in the paper backdrop behind the product. Match the surrounding background tone and existing light falloff. Leave the product, its shadow and every visible product detail unchanged.
Check: The background should improve without turning a curved product edge into a straight line. For a small defect, use a local edit when available.
3. Remove an unrelated object
Remove only the loose cable at the far left of the photo. Reconstruct the tabletop in that area using the surrounding surface as reference. Keep the product and its included accessories exactly where they are.
Check: Confirm the cable is unrelated to the sale. Do not remove an included accessory or a functional part because it looks untidy.
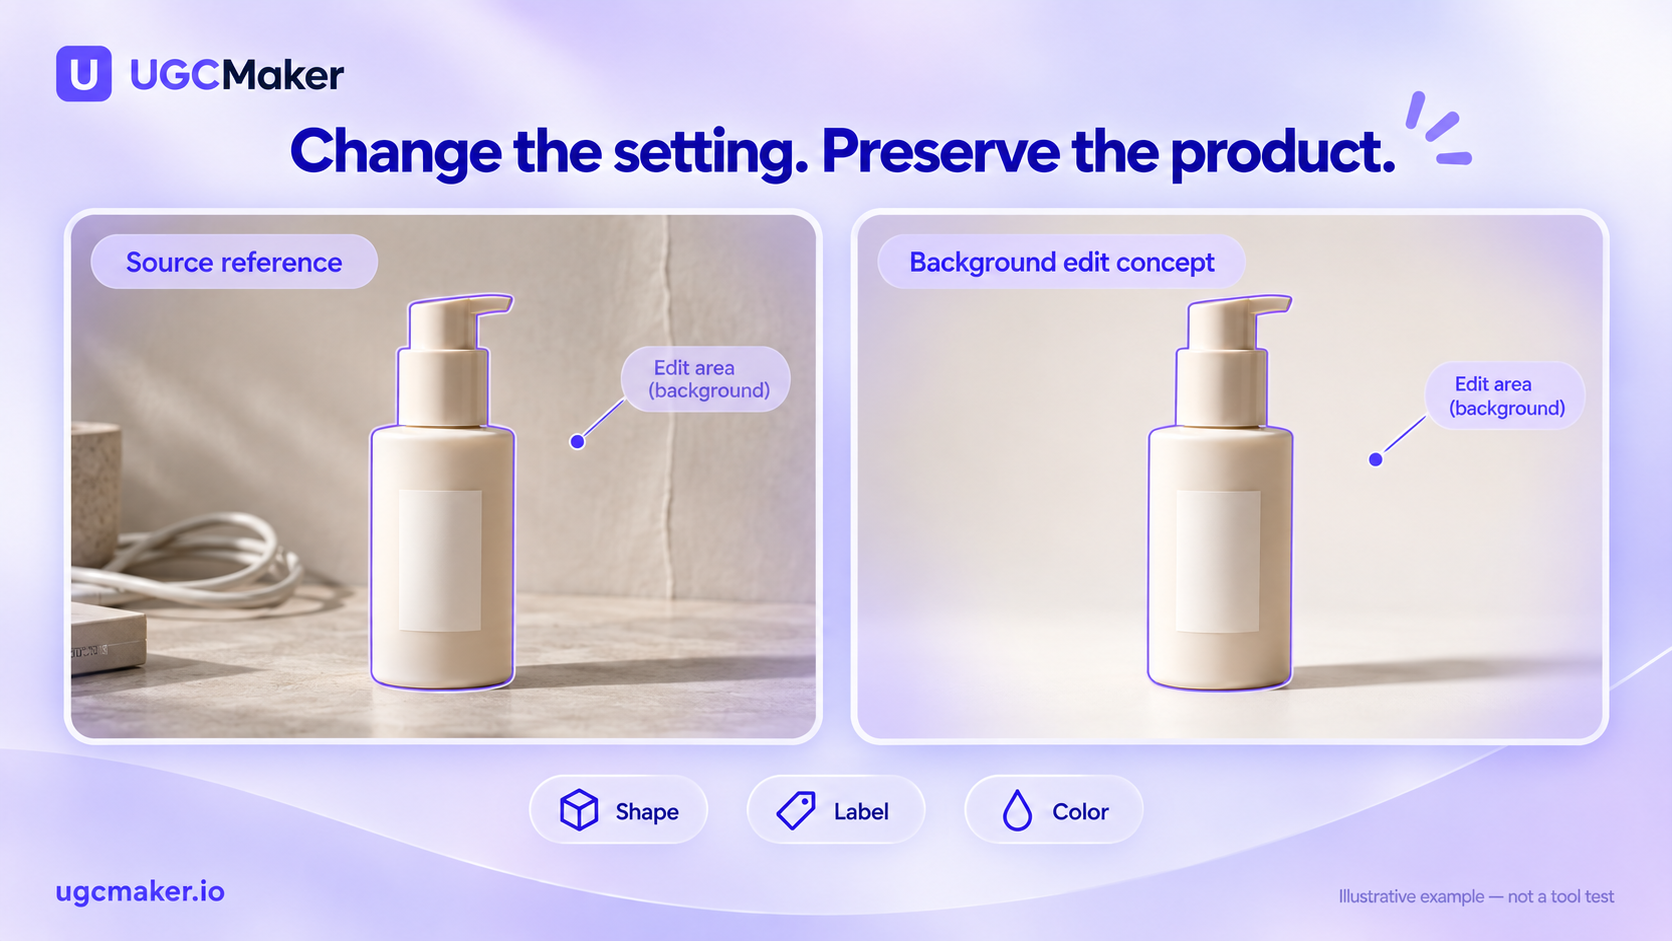
Editing concept: change the surroundings while checking the original product details. These images illustrate the task, not a tested editor output.
4. Reduce a harsh surface reflection
Reduce the bright reflection on the upper-right side of the packaging enough to reveal the existing surface. Preserve the package shape, material finish and printed artwork. Do not reconstruct unreadable words or add details behind the reflection.
Check: If the glare obscured essential text, use another photograph. A generation cannot verify what was hidden.
5. Lighten a dark side of the product
Add gentle fill light to the shadowed left side of the product. Keep the original light direction and a visible contact shadow. Preserve the photographed color, texture and contour; avoid a glowing outline.
Check: Compare material and color with an approved source image. Keep lighting changes subtle when color accuracy is essential.
6. Make the background cooler
Shift only the background from warm beige to a pale cool gray. Keep the product, label and surface beneath it at their original colors. Maintain the existing shadow direction and edge softness.
Check: White packaging and silver metal should not pick up an unintended blue cast. A background edit can spill into the subject.
7. Add a grounded contact shadow
Add a soft contact shadow directly beneath the product, consistent with light from the upper left. Keep the product upright at the same size and location. Do not create a floating effect, reflections or a second shadow.
Check: The shadow should meet the base. Reject a gap that makes the object appear suspended.
8. Replace a tabletop surface
Replace the visible tabletop with a quiet, light stone surface. Keep the product's current angle and footprint. Preserve the contact point and match the existing perspective. Do not add decorative objects or change the product material.
Check: Look at the base and any transparent areas. Use this for an appropriate styled image, not as proof of how the product looks in every environment.
9. Create empty space for ad copy
Recompose this product photo on a wider canvas with empty background on the left for text that will be added later. Keep the full product on the right at its original proportions. Continue the existing background and generate no lettering.
Check: Add the real offer and brand typography in your layout tool. Reject a resized cap, shortened handle or stretched label.
10. Extend a portrait composition
Extend the background above and below the current image for a vertical composition. Preserve the whole product and its viewing angle. Add only more of the existing background and surface; do not invent unseen product parts.
Check: Select the target aspect ratio in the editor where available. A ratio in the prompt alone is not a reliable export-size setting.
11. Simplify a lifestyle scene
Keep the product and the table it rests on. Simplify the distant background into an uncluttered room with subdued colors. Preserve the product size, position and lighting direction. Remove decorative clutter without adding new objects beside it.
Check: The product should remain the same object. Avoid using generated surroundings as a trustworthy size reference.
12. Add a seasonal background accent
Add a small, out-of-focus autumn leaf arrangement in the far background. Leave clear space around the product and do not overlap it. Preserve its packaging, colors and contact shadow. Add no seasonal text, extra products or gift bundle.
Check: Make sure the composition does not suggest that decorations are included in the purchase.
13. Remove dust from the set
Remove the visible dust specks from the background surface only. Leave the product's own texture and condition unchanged, including any scratches visible on the item. Preserve the original shadow and reflection.
Check: For resale listings, the item's condition is part of the information. Do not turn set cleanup into concealed product damage.
14. Adjust the backdrop for a catalog set
Change the backdrop to a light neutral gray with a gentle gradient behind the product. Keep the existing product photograph's shape, color and printed details. Preserve its original shadow direction and leave all other objects unchanged.
Check: Compare this result against the approved catalog reference. A prompt is not a calibrated color specification; use conventional editing for an exact background value.
15. Reduce background emphasis
Soften only the distant background detail so the product is easier to distinguish. Keep the complete product, its label and its immediate contact surface sharp. Preserve the current framing and avoid blur along the product boundary.
Check: Inspect thin structures, straps and edges. Artificial blur should not erase part of the item or create a cutout halo.
How to use the prompts in UGC Maker
- Open the AI Photo Editor and upload the original product photo in the Image area. Keep an untouched copy for comparison.
- Choose a model and paste one adapted template into Prompt. Name visible features rather than relying on “perfect,” “premium” or “high quality.”
- For a local edit, the Seedream 5 Pro option exposes Mark controls. Mark the relevant area, apply the selection and describe the change using the corresponding area tag. Selection is guidance, so still inspect outside it.
- Choose the available aspect ratio, resolution and output count for that model. Review the displayed credit requirement before submitting. Available credits affect access; a login or purchase prompt may appear.
- Run the edit, open a result and compare it with the source. Check the full composition first, then lettering, edges, material and small parts at 100%.
- Save an accepted result with the original, prompt and settings. If product details changed, return to the original and narrow the edit rather than repeatedly editing the damaged version.
The model and settings can affect results. This workflow describes controls, not a promise that every template will work on every photo.
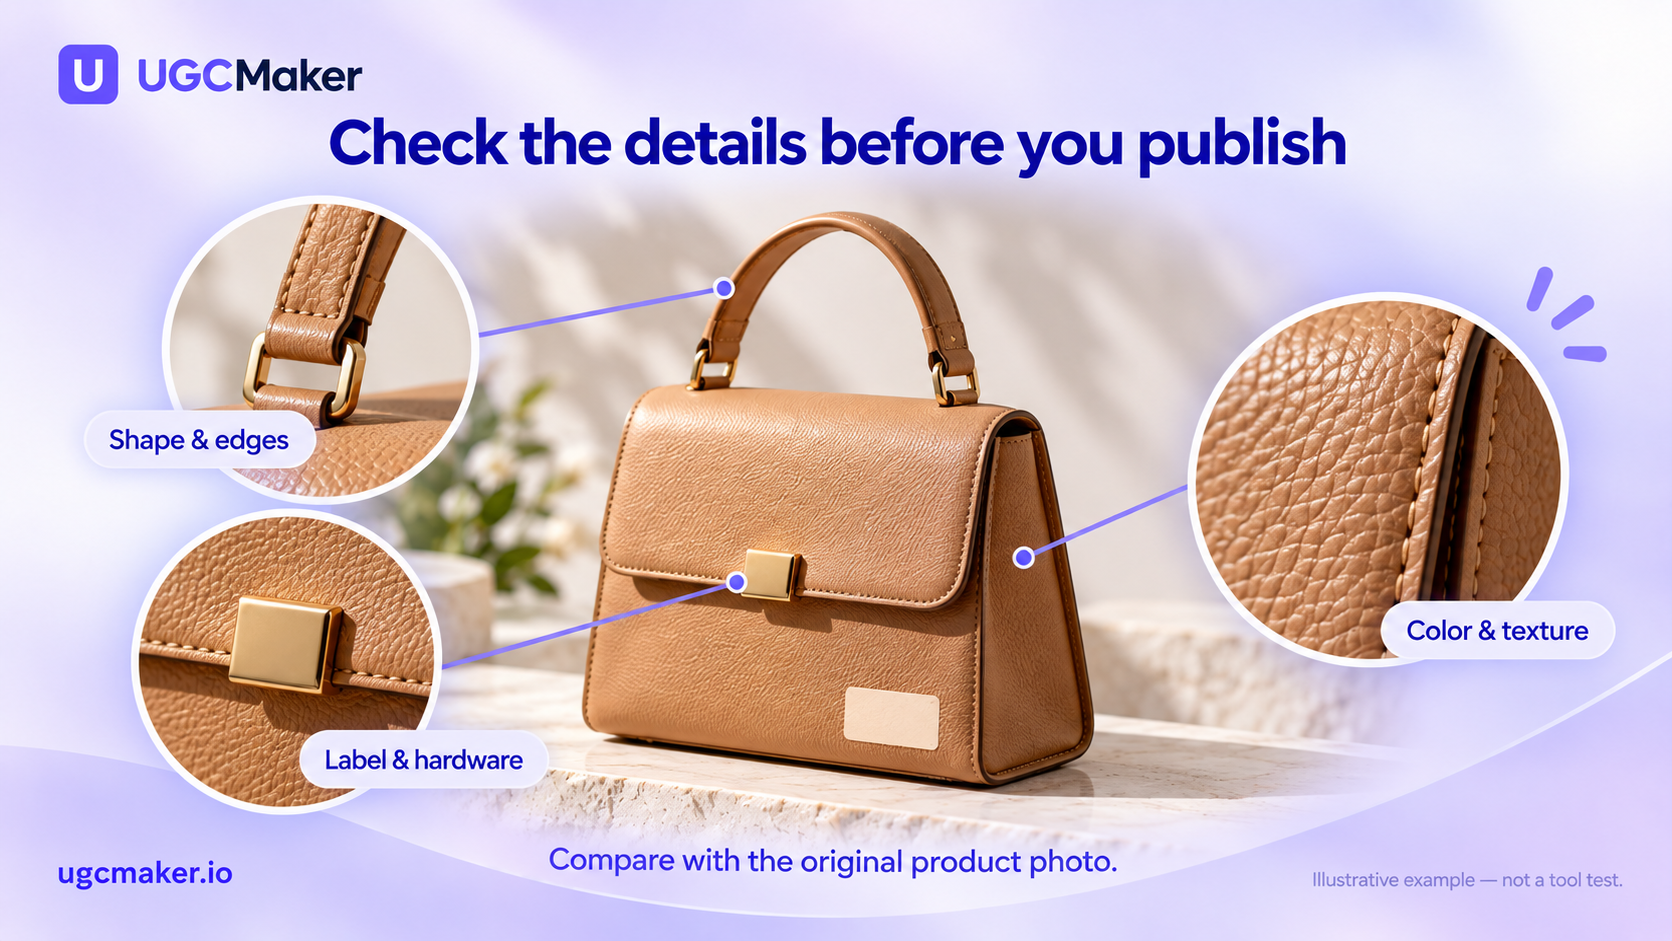
Compare these details with your source photo before accepting an edit. The callouts are illustrative, not a product test.
Fix the failure instead of making the prompt longer
| Failure | Next attempt | When to stop generating |
|---|---|---|
| Label text changes | Restrict the edit to the background | Exact lettering is still altered; use compositing to retain original pixels |
| Product shape drifts | Remove angle, perspective and styling requests | The new view requires hidden details; photograph that angle |
| Color changes | Keep the source lighting and edit only the surroundings | Exact SKU color cannot be confirmed against the real item |
| Texture looks synthetic | Remove sharpening or “enhance detail” instructions | Fabric, grain or wear no longer matches the source |
| Too many included objects | Request an empty scene around the original product | The result still misrepresents what ships |
If the composition is correct but you need a larger file, treat that as a separate step. Our guide to upscaling without losing quality explains the tradeoffs; adding “16K” to an editing prompt does not verify output dimensions.
Check the destination before publishing
A homepage campaign, a social ad and a shopping-feed main image have different requirements. Keep a faithful product reference and choose the appropriate image for the placement.
For Google Merchant Center, consult the current image-link requirements. Google requires metadata identifying images made with generative AI and says existing digital-source metadata should be preserved. We have not verified that UGC Maker exports supply that metadata automatically; check the exported file and your feed workflow before submitting it.
Frequently asked questions
What makes an AI photo editing prompt useful for ecommerce?
It describes a limited change and makes the important product details easy to check afterward. “Remove the background clutter; preserve the label, handle and three buttons” gives you a clearer acceptance test than “make a professional product photo.”
Can I use a prompt to show a different product color?
You can explore a concept, but a generated shade does not confirm a real variant. For a sales image, start with a photo of the actual colorway and check it against the item you sell.
Can these prompts guarantee that my logo stays unchanged?
No. Explicit preservation instructions help define the task but do not guarantee exact text or pixels. If logo fidelity is essential, retain the original product pixels through a conventional masking or compositing workflow.
Do I need all 15 prompts for one photo?
No. Pick the single edit that solves the problem. Open the AI Photo Editor, use one source photo and one prompt, and accept the result only after checking the product details.