


TL;DR
- “Without losing quality” means preserving an image's useful appearance at the intended size; it does not mean perfectly recovering missing original detail.
- Start with the cleanest source and enlarge only to the pixel dimensions you actually need.
- For a substantial increase, test an AI image upscaler against a conventional resize from the same original.
- Inspect both files at 100% zoom for changed text, faces, logos, halos, unnatural texture, and color shifts.
- Keep the original, avoid repeated exports, and use the version that is most faithful to the source—not simply the largest file.
If you want to know how to upscale an image without losing quality, the honest answer is to define what must survive the enlargement. A portrait must still look like the same person. A product photo must keep its label and color. A graphic must keep its text and edges. More pixels are useful only when those details remain trustworthy and the file works at its final size.
This guide is a review workflow for images that are already worth using. If you are unsure whether your issue is pixel count or print PPI, read the image-resolution decision guide first. If the source is a photograph with blur or noise, start with the photo diagnosis guide.
What “without losing quality” can realistically mean
When an image is enlarged, new pixels must be calculated. Traditional resampling uses nearby pixels to estimate them. AI upscaling predicts plausible edges and textures. Either method can produce a visually useful file, but neither proves what uncaptured original details were.
Adobe's image size and resampling documentation states that upsampling cannot add detail that was not in the original. The practical goal is therefore no important visible damage at the final use size, not mathematical zero loss or perfect recovery.
Decide what matters before processing:
| Image type | Details that must remain faithful | Warning signs |
|---|---|---|
| Portrait or people photo | Identity, eyes, skin texture, hair | Altered features, plastic-looking skin |
| Product image | Shape, material, color, labels, logo | Invented writing, changed edges or color |
| Illustration or graphic | Linework, typography, flat-color borders | Wobbly lines, halos, distorted letters |
| Landscape or texture | Natural patterns, gradients | Repeated patterns, smeared foliage, banding |
For logos, diagrams, or text-heavy artwork, look for the original vector file or a higher-resolution export before using AI. Keeping exact lettering matters more than creating plausible texture.
A quality-first upscaling workflow
1. Pick the best original and set a target
Use the largest, least-compressed source you have. Write down the destination's pixel dimensions or print requirements. Keep the original unchanged, then create working copies for each method you want to compare.
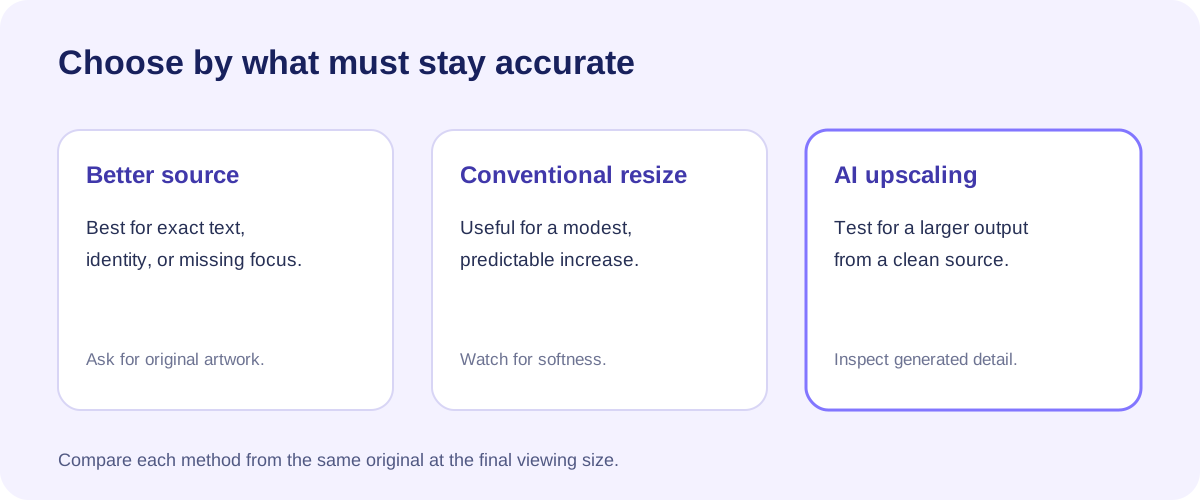
If the target only needs a small size increase, a conventional resize may be sufficient. If the gap is larger and the source has clean details, AI upscaling is worth testing. Avoid choosing 16K just because it appears on a tool page; a smaller output may better suit the actual use.
2. Test the source in UGC Maker
Open the AI Image Upscaler. Its current interface provides an upload area for PNG, JPG, JPEG, and WebP files up to 16 MB and target choices labeled 2K, 4K, 8K, and 16K. Upload your working copy, choose a relevant target, and generate the image. Check the actual exported dimensions afterward, especially if your source is not a 16:9 landscape image.
If you have a conventional editor, also make one resized copy from the same original. Adobe's resampling options describe methods intended for enlargement. This comparison is more useful than comparing an upscale with a thumbnail preview at different zoom levels.
3. Compare the same crops at 100% zoom
Put source and output side by side and inspect equivalent areas. The output has more pixels, so also view both at the intended display size. Use the checklist below rather than relying on an overall “sharper” impression.
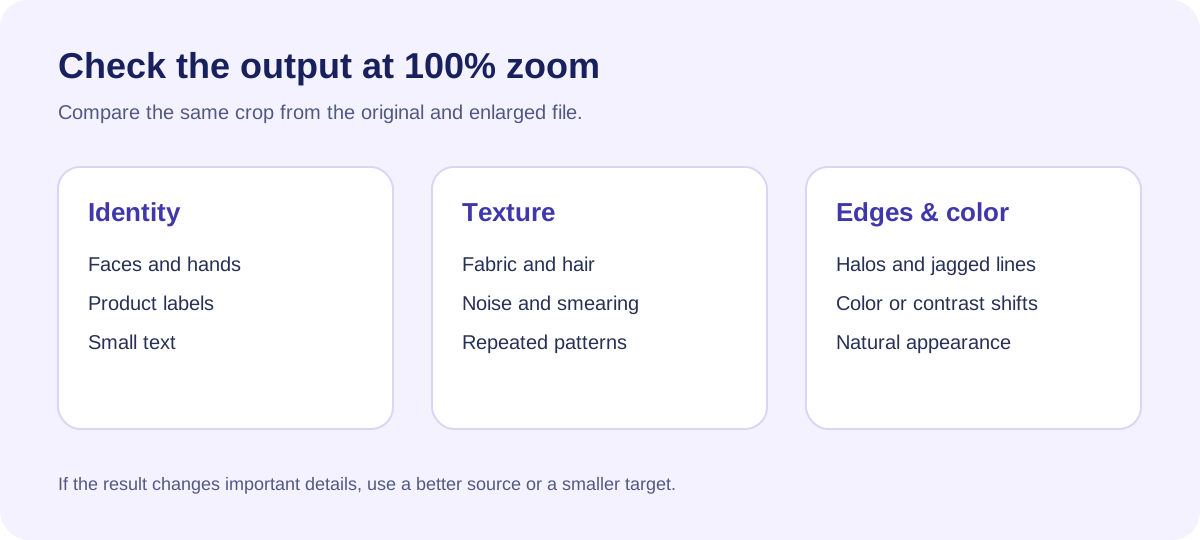
- Faces and hands: Have recognizable features or proportions changed?
- Text and logos: Is every character still correct and readable?
- Product shape: Are straight edges, seams, and packaging details faithful?
- Texture: Do skin, fabric, leaves, or hair look natural rather than waxy or repeated?
- Halos and noise: Do bright outlines or amplified compression blocks appear?
- Color: Have brand colors, skin tones, or gradients shifted?
If a detail is important and the larger image changes it, do not publish the output as though it were the original. Try a smaller target, a different source, or manual correction. For identity, legal, medical, or factual evidence, do not use generated detail to infer what the original showed.
4. Export for the actual destination
Keep your original and the selected final file separately. Avoid repeatedly opening and re-exporting a lossy copy. If your workflow offers a lossless format and file size allows it, use that for a master file; make a delivery copy optimized for the final platform. Inspect the delivered file too, because platform compression can change how the result looks.
The UGC Maker page's visible controls establish its input formats and target presets; they do not establish every export setting. Check the available download format in your own result before choosing a delivery workflow.
When to stop and use a better source
Upscaling is a weak fix when the only available image is a tiny thumbnail, a heavily compressed screenshot, an out-of-focus photo, or a file with unreadable small text. In those cases, locating the original, requesting a new export, rescanning, or reshooting can preserve more trustworthy detail than another enlargement pass.
This is especially important for ecommerce. A generated label that looks plausible but is wrong can misrepresent the product. Treat the original package artwork as the source of truth, and check any AI-upscaled asset against it before publishing.
FAQ
Is it possible to upscale an image with absolutely no quality loss?
Not as a guarantee for raster images. Enlarging requires new pixels, and predicted detail can differ from the original scene. You can often keep the image looking good at its intended size by starting with a clean source, choosing a suitable target, and reviewing the result.
Is AI upscaling always better than bicubic resizing?
No. AI may make photographic texture more convincing, while a conventional resize can be preferable when predictable shapes or exact graphics matter. Make both copies from the same original and compare the parts your audience will notice.
Can I upscale text in a screenshot or product label?
You can make it larger, but generated letters may be wrong. For exact text, re-export the source document or artwork at a higher resolution, or rebuild the label from its original design file.
Final takeaway
The best way to upscale an image without visible quality loss is to choose a target based on its real use, compare the result with the original at full size, and reject any invented detail that matters. Try the UGC Maker AI Image Upscaler when the source is clean but undersized, and use the UGC Maker homepage to find a different workflow when the source needs more than enlargement.