

TL;DR
- Video to prompt turns visible and audible content into a written description you can adapt. Treat it as a new interpretation, rather than proof of the original creator's prompt or settings.
- Start with a shot table: time range, visible action, framing, apparent camera movement, dialogue, and editing notes.
- Keep observations separate from your new creative instructions. Mark uncertain details instead of filling them with plausible guesses.
- In UGC Maker, UGC Prompt Generator → From video provides a reference-video upload and an optional analysis-focus field. The output is text; making a new video is a separate task.
- Review the shot boundaries and important actions before using the prompt. A fluent paragraph can still miss the moment that makes the reference useful.
A good video-to-prompt workflow helps you explain what should happen on screen. It is particularly useful when you like the way a clip introduces a problem, moves toward a product, or delays a reveal, but need an original version for a different item.
This UGC Maker guide combines a manual analysis method with the current video-input interface of our UGC Prompt Generator. Interface observations were made on November 13, 2026. The worked example and analysis instructions below are AI-assisted editorial examples; we did not upload a source clip or benchmark the analyzer's accuracy for this article.
Decide what the analysis needs to produce
“Write a prompt for this video” leaves the analyzer to choose what matters. A video includes several kinds of information, and they do not all belong in the same generation prompt.
| Deliverable | Include | Use it for |
|---|---|---|
| Visual shot description | Subject, setting, framing, visible action, lighting | Planning the new scene |
| Motion notes | Start pose, action sequence, apparent camera movement | Choosing motion instructions or a reference workflow |
| Dialogue or transcript | Audible words, with uncertainty marked | Drafting a separate spoken script |
| Editing notes | Cuts, captions, transitions, sound cues | Assembling the final sequence |
| Adaptation brief | Your product, new message, and changes to the source idea | Making an original version |
Choose one main goal. For example: “Identify how the product is revealed and describe the camera movement in each shot.” That request is easier to review than a demand to reconstruct everything about the production.
If you need a new character to perform the source action, keep the clip as a possible motion reference too. A written description and a driving video are different inputs. Our AI motion transfer preparation guide explains that distinction.
Use the From video workflow in UGC Maker
The current interface gives you a concrete starting point:
- Open the UGC Prompt Generator and select From video.
- Prepare a playable reference file you are authorized to use. The inspected upload control lists MP4 / MOV, up to 50 MiB, and up to 120 seconds.
- Add an Analysis focus if there is a particular action, camera move, or product demonstration you need described.
- Choose the output language.
- Review the current credit information and account prompts, then use Analyze video when your input is ready.
- Compare the resulting text and storyboard with the source before adapting them for production.
These are the controls and input limits observed on the inspection date, supported by the current file-validation code. Upload acceptance, analysis accuracy, and finished-video quality are separate things. The page's example output is explicitly labeled as an example, so do not mistake it for an analysis of a file you selected.
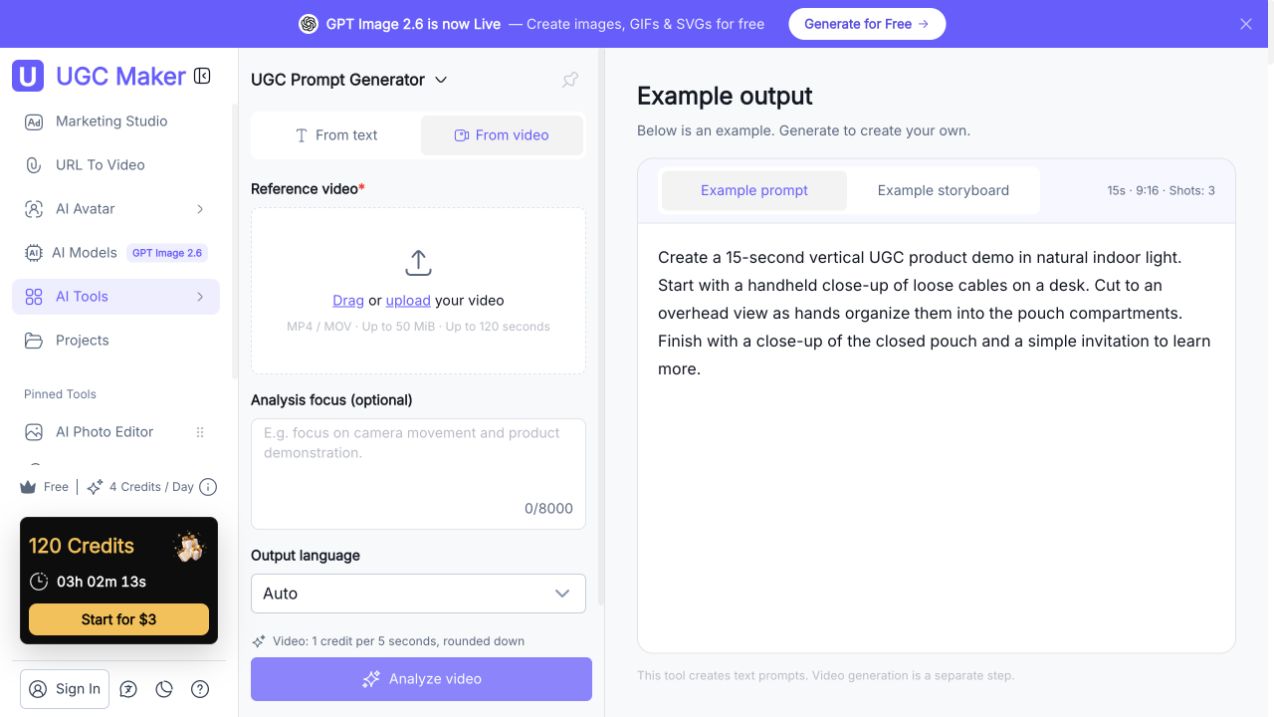
Actual logged-out interface, November 13, 2026. No reference was uploaded; the output area shows the tool's built-in example.
The observed workflow uses a file upload. It does not establish support for pasting any TikTok, Instagram, or YouTube URL. Prepare the source through the input method the tool actually exposes.
Build a shot table before writing the final prompt
You can do this manually in a video player, or use an analyzer to draft the notes and then correct them. A shot table makes it easier to find missing actions than a single block of prose.
Pass 1: mark the changes of shot
Watch the clip once without trying to name every technique. Note when the view changes and whether the change is a cut or continuous movement. Record approximate time ranges and refine them around any moment that matters to the remake.
A phone moving closer to a product is not automatically a new shot. Conversely, two views of the same tabletop can be separate shots if there is a cut between them. That difference affects whether you should ask for one continuous generation or plan an edit.
Pass 2: describe action with verbs
Write what the subject does: enters, lifts, rotates, points, pauses, places, or exits. Add the order when it carries the meaning.
“A premium product demo” describes an impression. “A hand places a closed pouch on the desk, opens it, and removes a cable” gives you an action you can inspect.
Do not infer product performance from appearance alone. A scene of someone smiling beside a device does not establish that the device solved a problem. Keep product specifications and approved claims in a separate brief.
Pass 3: separate the camera from the subject
Check whether the subject moves within the frame, the view moves around the subject, or both happen. Look at the background and relative positions to support your interpretation.
When the evidence is ambiguous, write the visible change first: “the product occupies more of the frame.” You can mark “possible camera approach or zoom” as an inference, then choose the camera move you want in the new version. You do not need to invent a lens measurement to write a useful brief.
Pass 4: inspect sound and text independently
Record spoken words only when they are audible. A caption may summarize, translate, or contradict the speech. Keep those fields separate. For an unclear phrase, note that it needs confirmation rather than inventing dialogue that fits the scene.
Time references help narrow an analysis request. Google's video-understanding documentation describes asking about specific timestamps and notes that sampled video analysis can miss rapid motion or quick scene changes. That supports a practical precaution: manually revisit the short moment that matters most. It does not establish which model or sampling method UGC Maker uses.
An analysis request you can adapt
Use this as a structured request for a video-capable analyzer. In a tool with a short focus field, use only the parts relevant to your task.
Analyze this clip for a new product-video brief. First describe the visible sequence without adapting it. For each shot, list the approximate start and end time, subject and objects, framing, visible action in order, apparent camera movement, readable on-screen text, and audible dialogue or sound. Mark uncertain details as uncertain. Separate observed footage from suggested changes. Do not invent a camera model, lens specification, product claim, or hidden generation setting. Finish with the three details most important to the sequence's meaning.
This is an original, untested instruction template. It does not guarantee that a tool will detect every cut, read every label, or transcribe every word.
A narrower focus could be:
Focus on the product reveal: identify what the viewer sees before the reveal, the action that reveals the item, and the framing immediately afterward. Keep dialogue and captions separate.
The first request collects a production inventory. The second answers a specific creative question. Choose according to what you will actually do with the notes.
Worked example: a three-shot organizer video
The following is a fictional 12-second reference plan created for this guide. It is not an analyzed customer video or a result from the UGC Prompt Generator.
| Planned time | Visible action | Framing and camera note | Adaptation decision |
|---|---|---|---|
| 0–3 s | A hand places a tangled cable on a plain desk | Fixed view from above | Keep the opening object placement |
| 3–8 s | Cut to an open organizer; hands place the cable inside | A closer overhead view | Use the actual compartments of your item |
| 8–12 s | Cut to the closed organizer beside a bag | Static product view | Add your own end-card text in editing |
The useful pattern is introduce an object → show where it goes → end on a clear product view. Your product facts still need to come from your own assets. Do not add waterproofing, capacity, or durability claims because the reference looks convincing.
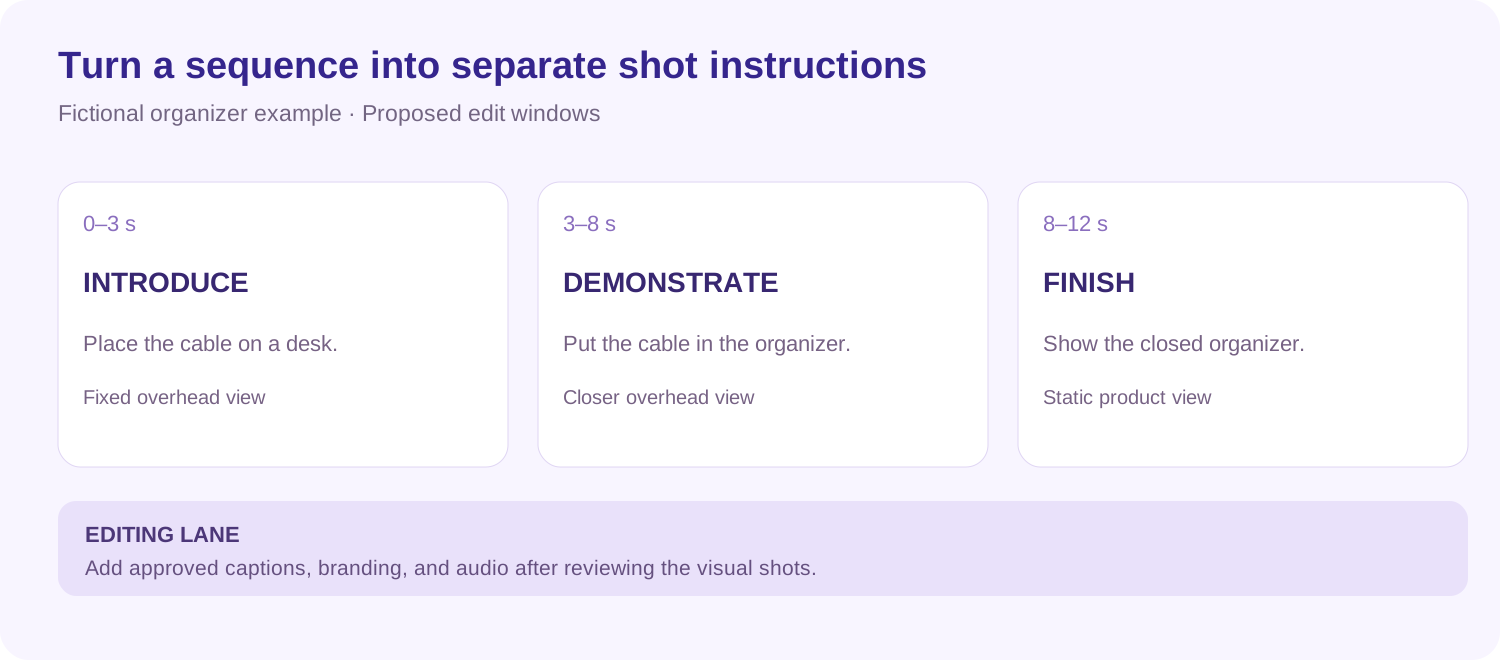
Illustrative planning diagram, not extracted footage or a generated-video result. Times are proposed edit windows.
Translate each shot into a generation instruction
For the middle shot, a possible instruction is:
A fixed overhead close view of the uploaded open organizer on a plain desk. One pair of hands places a coiled cable into the visible main compartment. Keep the organizer's shape, color, zipper position, and compartment layout consistent with the product reference. Use even indoor light. Keep the camera still and keep the hands and organizer visible throughout the action.
This prompt is an untested starting point. It describes one action and one view. Review the physical interaction and use actual product footage if the generated shot misrepresents how the item works.
For a multi-shot version, keep the three instructions as separate production units unless your chosen model and workflow support the sequence you need. Add captions and the end card in the edit so they can be corrected without replacing otherwise useful footage.
Keep the adaptation separate from the observation
Suppose your item is a compact tech pouch with a single pocket, while the reference has several compartments. Your observation should still say that the reference has compartments. Your adaptation should explicitly request the single-pocket product shown in your own image.
Changing the observation to match your desired product makes the analysis unreliable. Keeping the two records separate lets you reuse the same structural idea with different items without losing track of what came from the source.
Review the prompt before generating a new video
Use the source as the answer key for observations, and your approved brief as the answer key for changes.
| Question | Revision if the answer is no |
|---|---|
| Does each described shot correspond to something visible? | Remove invented actions or add the missing shot |
| Is the key cause-and-effect sequence intact? | Restore the action that connects the opening to the reveal |
| Are dialogue, captions, and sound separate? | Move them into their own fields |
| Are camera claims supported by the footage? | Describe the visible change and mark uncertainty |
| Do product details match your actual references? | Replace source-specific details with approved ones in the adaptation |
| Can the selected workflow accept the required inputs? | Change the workflow or simplify the plan |
Common corrections are small but consequential. “A hand reveals a bottle” and “a bottle appears in the hand” can produce very different actions. “Camera rotates” and “product rotates” also ask for different shots. Prefer a plain description you can evaluate over a cinematic phrase that leaves the action unresolved.
If the result is only a mood summary, request the specific shot and object interaction you are missing. If it describes too many events, separate the reference into shorter sections. If exact text is unreadable, keep it out of the observation and add approved wording later.
Take the reviewed brief into production
The written plan is useful even when you decide to film the scene instead of generating it. A creator can use the shot order and dialogue, while an editor can use the timing and caption notes.
For AI product content, Marketing Studio provides product and avatar references, a prompt, templates, and generation settings. Its observed Create Similar action loads a template setup; adapt that setup to the reviewed brief rather than assuming it reproduces an external reference automatically.
Use our UGC scripts guide when the next task is spoken copy. Use the video recreation guide when the next task is choosing between character replacement, motion transfer, and a format remake.
Frequently asked questions
Can video to prompt recover the original AI prompt?
Analysis of the footage produces a description of what can be observed. That alone does not verify the original prompt, model, seed, editing history, or production method. Original project records, if available, are a different source of evidence.
Can I turn a video into a prompt without an analyzer?
Yes. Watch it in a player, mark the shot boundaries, and describe the subjects, actions, camera, sound, and text. The worksheet in this guide provides the same structure for manual notes.
Does the UGC Prompt Generator create the finished video?
The inspected page explicitly says it creates text prompts and that video generation is a separate step. Review the text before taking it into a suitable generation or filming workflow.
Should I use one prompt for a whole edited video?
Use one prompt only when it matches the production unit your selected tool can handle. For a clip with distinct shots, a shot list and separate instructions often make it easier to preserve the structure and revise one part of the edit. This is a planning recommendation, not a guarantee for every model.
Where do I start with a reference clip?
Open UGC Prompt Generator → From video, prepare a supported source file, and tell the analyzer which action or reveal matters. Keep the source beside the notes so you can turn a plausible description into a usable shot plan.