


TL;DR
- To increase an image's pixel resolution, you must add pixels through resampling or upscaling. Changing the PPI number alone only changes its intended print size.
- Check the original width and height in pixels, then work backward from the screen placement or print dimensions you need.
- For a large increase, try the cleanest original in an AI image upscaler, then inspect the exported file at 100% zoom.
- AI can make new detail look plausible; it cannot recover the exact detail that the camera never recorded.
- If the source is out of focus or heavily compressed, finding a better original may help more than enlarging it.
If you are searching for how to increase resolution of image files, first decide what “resolution” means for your job. A print shop may be asking for pixels per inch (PPI) at a particular physical size. A website may need a larger width in pixels. Those are related, but changing one number does not automatically solve the other problem.
This guide gives you a short decision path, then shows how to prepare an image for a larger output without mistaking a bigger file for a sharper one.
Check the dimensions before editing
Open the original file's properties and note its width and height in pixels. For a screen placement, compare those dimensions with the pixels required by the layout. For print, ask the printer for the physical size and target PPI, then calculate the required pixels:
Required pixels = print size in inches × target PPI.
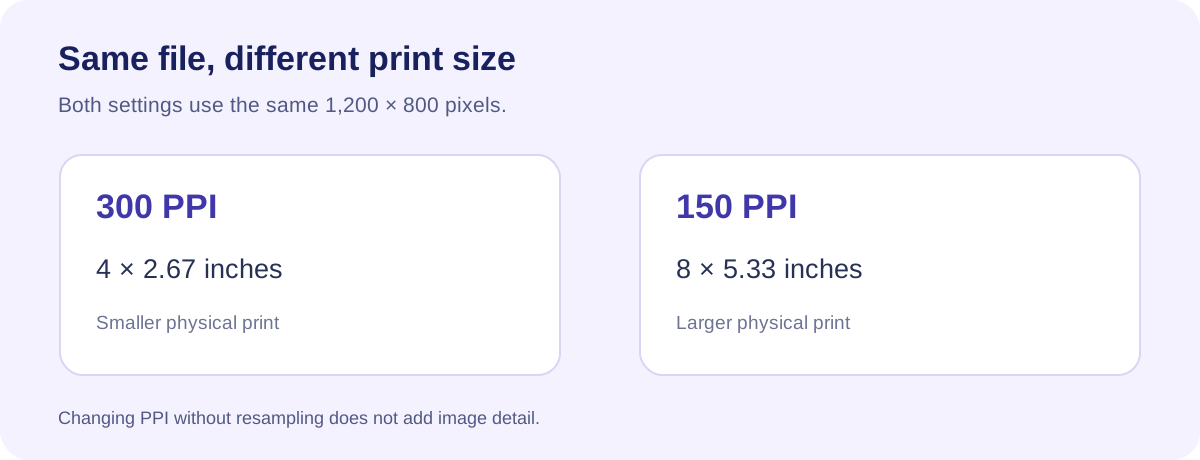
For example, a 1,200 × 800-pixel image contains the same pixels whether its metadata says 150 PPI or 300 PPI. At 300 PPI, those pixels cover 4 × 2.67 inches; at 150 PPI, they cover 8 × 5.33 inches. The second setting makes a larger print, not a more detailed image. Adobe's image size and resampling guide explains this distinction.
Choose the method that matches the problem
| Your situation | First action | What to expect |
|---|---|---|
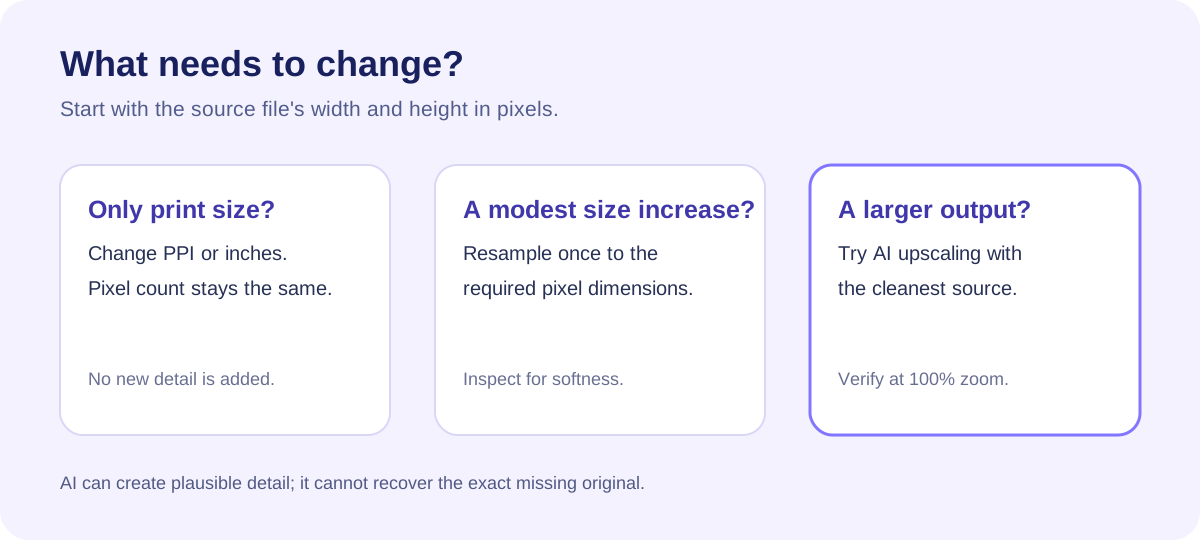
| Enough pixels, wrong print-size setting | Change PPI with resampling off | Physical print size changes; pixels do not. |
| A small increase in pixel dimensions | Resample once in an image editor | The file gets larger; fine detail may soften. |
| A much larger digital or print placement | Test AI upscaling with the best original | New detail can look more natural, but it is predicted. |
| Blurred, damaged, or tiny preview file | Find the original, rescan, or reshoot | A better source is usually the most dependable fix. |
This is the central rule: increasing pixel dimensions and increasing real image detail are different outcomes. Conventional resizing calculates new pixels from nearby ones. AI upscaling predicts plausible edges and texture. Neither can establish what an unreadable label or missing facial detail originally said or looked like.
If your problem is specific to a photograph rather than an illustration or graphic, use our photo-resolution diagnosis guide before choosing a method.
How to increase image resolution in UGC Maker
The UGC Maker AI Image Upscaler is useful when you have an existing image and need to test a larger version. Its current interface shows an upload area and 2K, 4K, 8K, and 16K target choices. Those labels show target presets; inspect the dimensions of your actual output instead of assuming every source will become the displayed landscape dimensions.
1. Start with the highest-quality original
Use the file exported from the camera, designer, or image generator if you have it. Avoid a social-media thumbnail, a screenshot of the image, or a repeatedly saved JPEG. Keep a separate copy of the original so you can compare it later.
2. Upload the image
The tool page currently accepts PNG, JPG, JPEG, and WebP files up to 16 MB each and shows a limit of 10 images per upload. Check the visible limits again when you use the tool because product settings can change.
3. Choose the smallest useful target
Select the 2K, 4K, 8K, or 16K option that fits your intended placement. A higher label is not automatically a better result. If a 2K version already fills the required slot, generating a much larger file adds review and storage work without a clear benefit.
4. Generate, then verify the file
Use Generate and compare the result with the original at the same crop and at 100% zoom. Check edges, text, faces, and repeated patterns. Confirm the exported pixel dimensions before submitting it to a client, printer, or website.
The cover illustration is based on the tool's visible controls; it is not a screenshot of a tested output.
How to do a modest resize in Photoshop
If you only need to change dimensions slightly, a conventional editor may be enough. In Photoshop, open Image > Image Size, keep the aspect ratio linked, turn Resample on, enter the target pixel width or height, and choose an enlargement method. Adobe documents the steps for changing pixel dimensions and the available resampling methods.
Save a separate copy and inspect it at full size. If the result is visibly soft, compare an AI-upscaled version instead of repeatedly resampling the already enlarged file.
Common mistakes that make a larger image look worse
- Changing 72 PPI to 300 PPI without adding pixels. This changes print metadata, not the image's screen detail.
- Upscaling a compressed preview. The model may enlarge compression blocks along with useful detail.
- Choosing the largest target by default. Work from the required display or print size.
- Checking only a small preview. Fine artifacts can hide until you view the file at full size.
- Trying to restore facts from guesses. Treat AI-generated text, faces, and product details as unverified.
For a more detailed review method, see how to upscale an image without losing quality.
FAQ
Does changing DPI or PPI increase image quality?
Not by itself. With resampling off, changing PPI changes the physical print dimensions assigned to the same pixels. To add pixels, you must resample or upscale the file. For on-screen display, check pixel dimensions rather than the PPI metadata.
Can I turn a low-resolution image into a high-resolution image?
You can create a file with more pixels, and AI may make it look better at the intended size. You cannot guarantee recovery of the exact original detail if it was never captured. Compare the result with the source before relying on small text or identifying features.
Should I choose 4K, 8K, or 16K?
Choose based on the output slot and the condition of the source, not the largest available number. Start with the smallest target that meets the real requirement, then check whether the image remains natural at its final viewing size.
Final takeaway
To increase image resolution effectively, identify the required pixel dimensions first, add pixels only when needed, and judge the enlarged file by its visible detail rather than its size label. If your original is reasonably clean and needs a larger output, test it in UGC Maker's AI Image Upscaler; the UGC Maker homepage lists other image and creative workflows when the source needs a different kind of edit.